
Charging System Checklist

You probably take it for granted that when you push the starter button on your bike, it’ll turn over and fire up. My girlfriend and I were taken by surprise before a ride recently, when her SV650 refused to turn over. It had been parked for a couple of weeks, but that wasn’t long enough to allow the battery, which had been replaced at the beginning of the season, to drain. I suspected a problem with the charging system, and after a couple of tests, I was proven right.
All modern motorcycles operate on a 12-volt DC (direct current) charging system, which consists of three main components: a battery, an alternator and a regulator.
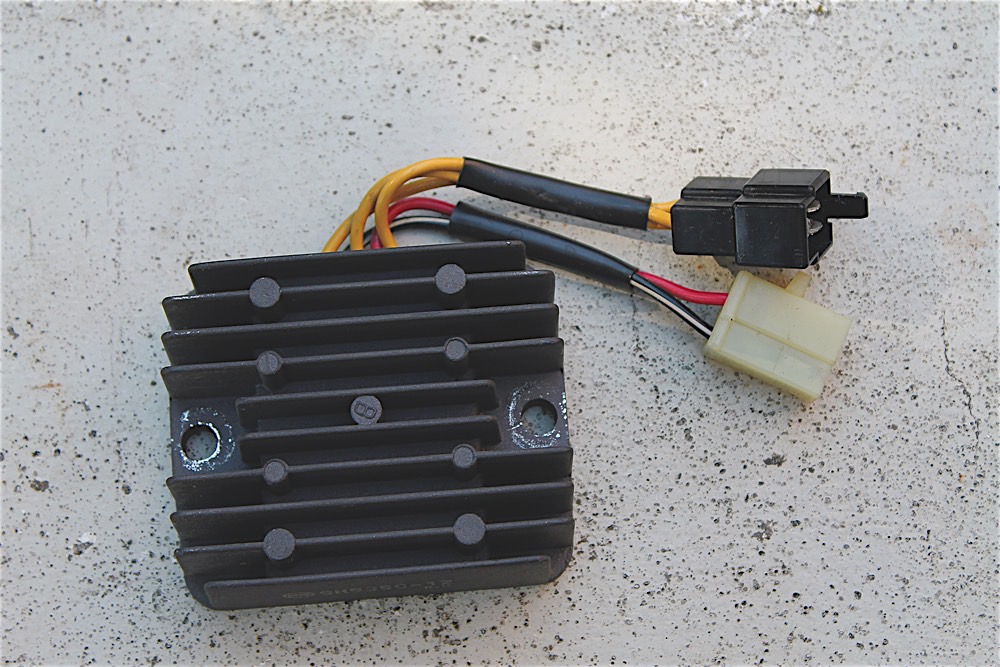
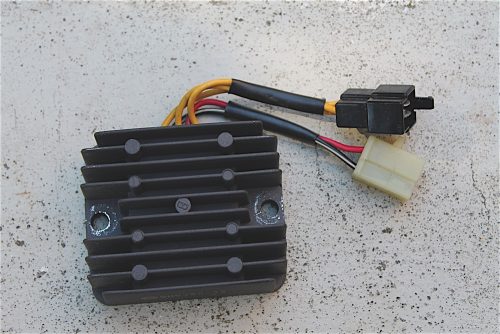
 The battery stores the energy needed to start the bike and operate all of the electrical components, even when the bike is running. The alternator provides unregulated AC (alternating current) electricity, which is eventually used to maintain the battery’s charge while the bike is running. The regulator, a small finned box, performs two functions: it regulates the voltage leaving the alternator, which increases with engine revs to approximately 12 volts, and it converts alternating current to direct current.
Aside from a service manual and a couple of basic hand tools to access the various charging system components, the only other item you’ll need to verify the charging system is a multimeter with AC/DC voltmeter and ohmmeter functions. But before performing any tests on the charging system, make sure the battery fluid is at the proper level (no need to check this on a maintenance-free battery), and that it is fully charged. A charging system, despite its name, will not charge a dead battery, and a good battery is needed to perform the various tests.
To be sure the battery is charged, attach a battery charger to it. Once the battery is fully charged, it should read more than 13 volts DC. Even though motorcycle electrical systems are rated at 12 volts, they actually operate at more than 14 volts when the engine is running. Note that a reading of 13 volts at the battery isn’t necessarily an indication that it is in good condition, but it’s enough power to start the bike and perform charging-system tests. A proper battery test should be performed using a load tester, usually found at auto and motorcycle shops.
 To test the charging system, run the engine and place the multimeter leads (reading DC volts) across the battery terminals. With the engine revving at about 3000 rpm, the voltage should read more than 13.5 volts but not more that 15 volts. On the SV, voltage at idle was about 13 volts, which is normal, but when the engine was revved, the voltage actually dropped, reading about 12.5 volts at 3000 rpm or more. This told me that further testing was needed.
The next item to verify is the alternator. Locate the alternator connector plug – it usually has three large-gauge wires coming off the stator, and most of the time they’re yellow. With the ignition off, disconnect the plug and attach the multimeter leads (in the ohmmeter function) to any two of the three wires on the alternator side. The service manual will tell you what the resistance should be when you check any two of the three wires (0.2-0.55 Ω for the SV), and they should all have similar readings. Also check between each wire and ground by connecting one lead to one wire and the other lead to a metal part of the bike. Any resistance here means there is a problem; it should be an open circuit.
There’s one more check to perform on the alternator. With the engine running, connect the multimeter leads (meter set to AC voltage) to any two alternator wires while revving the engine. Again, the specs here vary, but the stator should produce about 10 to 15 volts AC for every 1000 rpm. My SV read 72 volts at 5000 rpm, so it was fine.
Since the SV registered only 12.5 volts at the battery with engine revving, the alternator passed all tests, and all wires and connectors proved intact, the only culprit left was the regulator. There is a procedure in the manual to check all the wires coming out of the regulator, but I was confident enough in my testing procedure that I skipped this step.
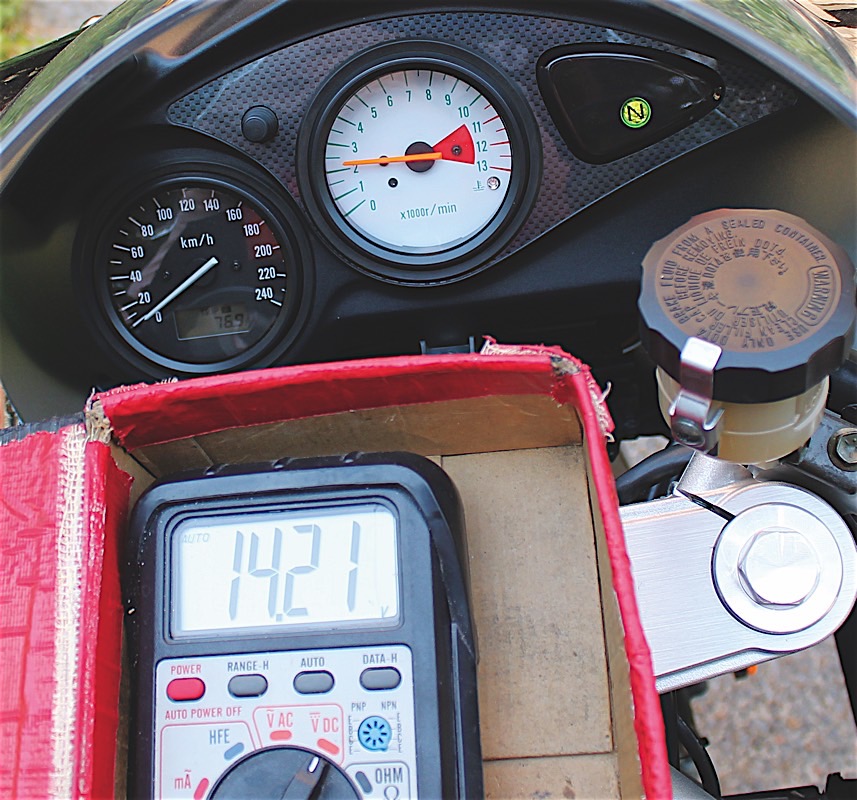
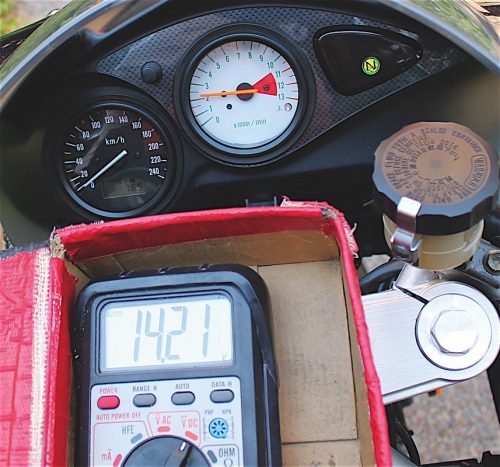
I ordered an aftermarket unit through a Canadian distributor at one-third the cost of the OEM regulator, plugged it in and immediately got 14.2 volts across the battery terminals at 2000 rpm.
If the SV had passed the battery voltage test with the engine running, the next thing I’d have checked is the current draw with the engine off. For this you must disconnect the negative terminal and place the multimeter between the negative battery post and the negative battery terminal. (It must read in milliamps [mA] for this test.) According to the SV manual, a reading of more than 1 mA indicates a problem, and the battery will drain prematurely. If you see a noticeable spark when you disconnect the negative terminal, you may need a multimeter that reads more amperage, say 10-amp, although a smaller meter should be protected by a fuse to prevent any damage.
Also, if you’ve added electrical accessories, or maybe if you use heated riding gear, you must make sure that you are not overwhelming the charging system with all of the accessories operating. Again, here, the voltmeter is your friend. Perform the voltage test, engine revving, with the voltmeter leads connected across the battery, but this time with all accessories turned on or plugged in. If the voltage drops with the engine revving, you’re taxing the charging system too much. Either manage your accessory usage or remove some of the stuff.
Lastly, to avoid embarrassment, make sure you didn’t last leave your bike with the parking light on. Don’t ask me how I found this out.
Technical articles are written purely as reference only and your motorcycle may require different procedures. You should be mechanically inclined to carry out your own maintenance and we recommend you contact your mechanic prior to performing any type of work on your bike.


Thanks for Reading
If you don’t already subscribe to Motorcycle Mojo we ask that you seriously think about it. We are Canada’s last mainstream motorcycle magazine that continuously provides a print and digital issue on a regular basis.
We offer exclusive content created by riders, for riders.
Our editorial staff consists of experienced industry veterans that produce trusted and respected coverage for readers from every walk of life.
Motorcycle Mojo Magazine is an award winning publication that provides premium content guaranteed to be of interest to every motorcycle enthusiast. Whether you prefer cruisers or adventure-touring, vintage or the latest models; riding round the world or just to work, Motorcycle Mojo covers every aspect of the motorcycle experience. Each issue of Motorcycle Mojo contains tests of new models, feature travel stories, compelling human interest articles, technical exposés, product reviews, as well as unique perspectives by regular columnists on safety or just everyday situations that may be stressful at the time but turn into fabulous campfire stories.
Thanks for considering a subscription. The Mojo team truly appreciates it.
