
The Home Tire Change


With the proper tools and a little mechanical know-how, you can save a few bucks and have the satisfaction of replacing your own rubber.
Performing your own tire change isn’t that hard, but first you need the proper equipment, which we discussed in the January/February 2015 issue of Motorcycle Mojo.
 It’s important to note that you should always wear safety glasses when working with compressed air. Before deflating a tubeless tire, inspect the valve stem base for cracks and listen for leaks; any damage here and the stem must be replaced. Once deflated, it’s time to break the tire bead. Sometimes it’s very easy to pop the bead off a rim, but if it’s a tubeless tire, it will take a lot of pressure to unseat it. The procedure requires the right tools; otherwise, it should not be attempted. Before popping the bead on a tubed tire, remove the valve stem locknut and push in the stem; if it’s a rubber valve stem, just push it in. All rims feature a “drop centre,” designed to provide the extra room needed when mounting and dismounting the tire off the rim. Pushing the valve stem in allows the tire bead to slip completely into the drop centre.
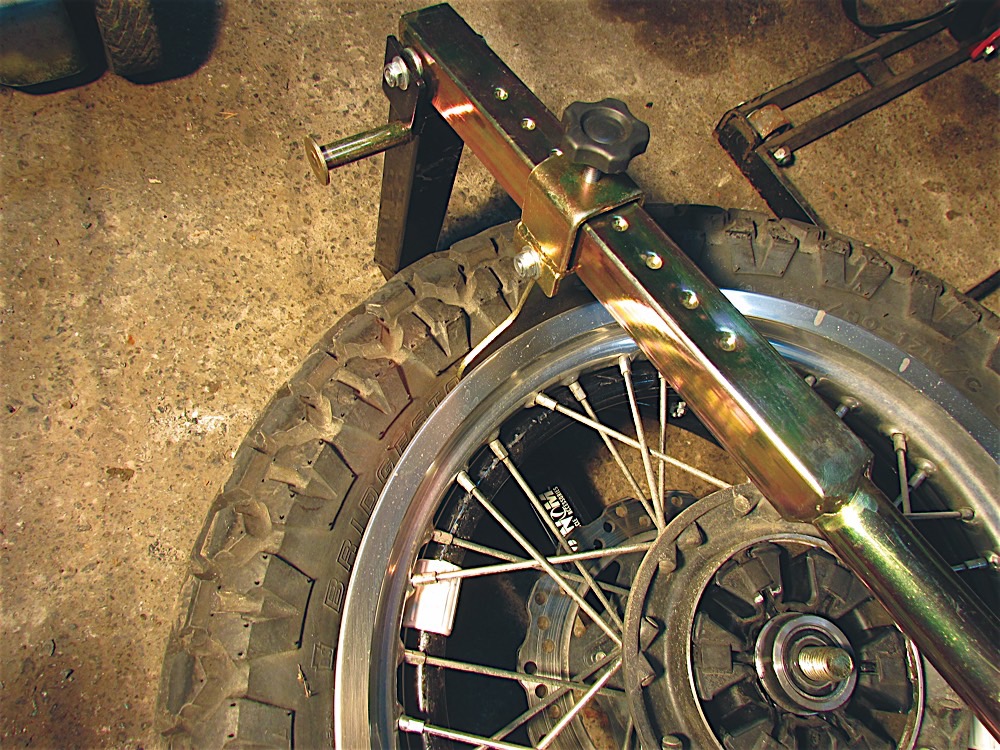
Breaking Bead
 With the wheel mounted onto a bead breaker, push the tire bead off the rim all the way around on both sides of the wheel. Once the bead is off the rim, thoroughly lubricate the tire bead on both sides with soapy water.
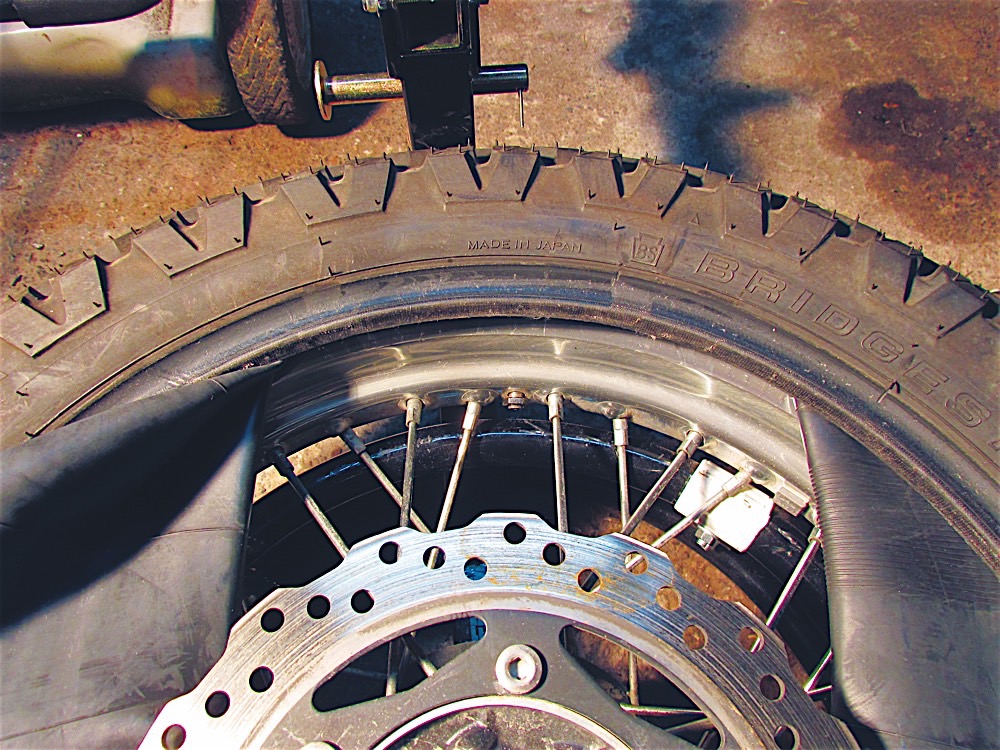
To remove the tire, you’ll work from one side of the wheel. Protect the rim from damage by installing a rim protector where you’ll place the tire iron. Ensure the opposite side of the tire is pushed into the rim’s drop centre and place one tire iron lip under the tire bead. Then lift it over the edge of the rim, starting 90 degrees to one side of the valve stem. The rim protector is mostly needed during the first few centimetres of prying, as it gets easier to pry the tire the farther you get around the rim. Improper valve stem placement will inhibit this. Once the tire is over the rim at one spot, work the long way around the rim toward the valve stem, prying small portions of the tire over the rim with the other tire lever in 15-centimetre increments.
Once the tire is dismounted on one side of a tubed tire, pull the tube out starting at the valve stem. Check it for damage, such as flakes of rust that may be stuck to it from a rusty steel rim or creases formed if it was improperly inflated the last time a tire was installed. Don’t skimp here; replace it if in doubt. Now pry the other side of the tire off the rim using the method described above. Inspect and clean the rim, and replace the tubeless valve stem if needed.
Reinstalling the Rubber
 After checking the new tire’s rotation, line up the balance mark (usually a painted dot) with the valve stem hole, lube the beads generously and push one side onto the rim starting at one end. This can often be done without the tire irons by using some force, though stubborn tires will need some prying. With one side mounted, pre-inflate the tube just a bit so it doesn’t fold over on itself once inside the tire, and insert it by first slipping the valve stem into its hole. On a steel stem, thread on the locknut just a couple of threads so the stem doesn’t slip out of the hole; on a rubber stem, thread on your valve stem remover tool.
With the tube inserted, pry the tire onto the rim starting 90 degrees from the valve stem and working the long way around the wheel. Be mindful of how deep you place the tire iron into the tire, and make sure you’re not prying on the tube or pinching it between the tire and the rim. As you work your way around the rim, also make sure the tire bead is always pushed into the drop centre on both sides of the wheel. It’s the last 15 centimetres that will be the most difficult.
Inflationary Measures
Once you’ve mounted the tire, inflate it until the beads pop on both sides of the rim (remember your safety glasses). Tire makers will tell you not to exceed the maximum recommended pressure while beading a tire or the Earth will spin off its axis, but in reality you’ll probably have to overinflate it a bit to succeed. Just be very careful and make sure the portion of the tire being beaded is facing away from you. Check all around the rim on both sides to ensure the tire bead is seated properly.
If it’s a tubeless tire, once the tire is beaded, all you need to do is readjust the pressure and check for leaks around the bead with soapy water. It’s always a good idea to check the valve stem, as well as the Schrader valve. On a tubed tire, deflate it completely, then re-inflate to the proper pressure. This will allow the tube to take its natural shape and relax any wrinkles that may have formed during the installation process, while having the maximum space within the tire to do so.
Before mounting the wheels back onto your bike, now is a good time check your brakes pads and caliper slides, and service them if needed.
Refer to the January/February issue’s Mojo Garage on how to balance your tires before heading out on the road.
Technical articles are written purely as reference only and your motorcycle may require different procedures. You should be mechanically inclined to carry out your own maintenance and we recommend you contact your mechanic prior to performing any type of work on your bike.


Thanks for Reading
If you don’t already subscribe to Motorcycle Mojo we ask that you seriously think about it. We are Canada’s last mainstream motorcycle magazine that continuously provides a print and digital issue on a regular basis.
We offer exclusive content created by riders, for riders.
Our editorial staff consists of experienced industry veterans that produce trusted and respected coverage for readers from every walk of life.
Motorcycle Mojo Magazine is an award winning publication that provides premium content guaranteed to be of interest to every motorcycle enthusiast. Whether you prefer cruisers or adventure-touring, vintage or the latest models; riding round the world or just to work, Motorcycle Mojo covers every aspect of the motorcycle experience. Each issue of Motorcycle Mojo contains tests of new models, feature travel stories, compelling human interest articles, technical exposés, product reviews, as well as unique perspectives by regular columnists on safety or just everyday situations that may be stressful at the time but turn into fabulous campfire stories.
Thanks for considering a subscription. The Mojo team truly appreciates it.
