
Striping It Right

Finding the proper decals is one thing, but applying them can be tedious and requires patience.
The latest motorcycle to join the others parked in my garage is a 1980 Kawasaki KZ550A. It was the first Kawasaki model to use the 553 cc air-cooled inline-four that eventually made it into bikes such as the GPZ550 and, later, the ZR550 Zephyr. Despite the collectors’ current desirability for the GPZ550 and, to a lesser extent, for the Zephyr, the lowly KZ550A is not quite as popular. When it was released, it was a basic model with a single front disc brake and even had contact-point ignition – as opposed to the electronic ignition of the KZ550 LTD cruiser released the same year.
 Despite the KZ550A’s inability to garner a high price at a vintage-bike auction, I intended to restore my bike to its original glory. My KZ550A was in excellent condition when I acquired it, and its odometer read 23,542 km, which I have no reason to believe was not authentically recorded. Aside from consumables such as tires and brake pads, the only non-original items on the bike were the handlebar and handgrips. I’ve since sourced originals and have installed them. I have also converted the contact-point ignition to electronic to reduce maintenance. Otherwise, everything else is as it was when the bike left the factory floor, including the paint.
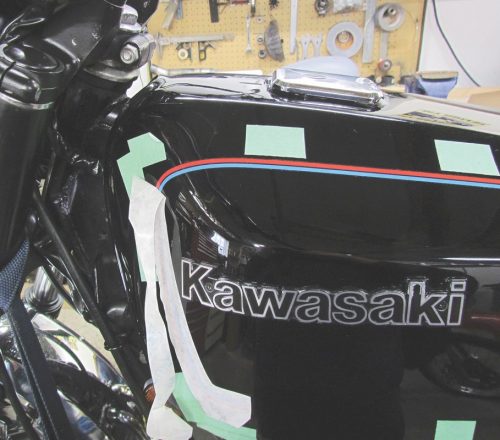
However, one thing was missing from my bike when I acquired it: the original blue-and-red pinstripes that followed the contours on the gas tank and tailpiece. The original pinstripes were not painted on; instead, they were decals that were applied atop the final coat of paint at the factory. In the four decades since my KZ was produced, someone had removed the pinstripes – perhaps in an effort to personalize the machine.
Fortunately, there is a company called Diablo Cycle located in London, Ont., that makes quality reproductions of OEM decals and striping for many vintage Japanese motorcycles dating from the 1960s through the 1990s. On Diablo Cycle’s website, I found the correct decals: Part No. KKZ-80-550, at a cost of $145 including shipping. Yes, they’re costly, but they are quality items made from vinyl, they are accurately reproduced and they’re a must if you are restoring a classic Japanese bike. The vinyl is very thin, so it protrudes very little once applied, and can be painted over with clear coat for longevity.
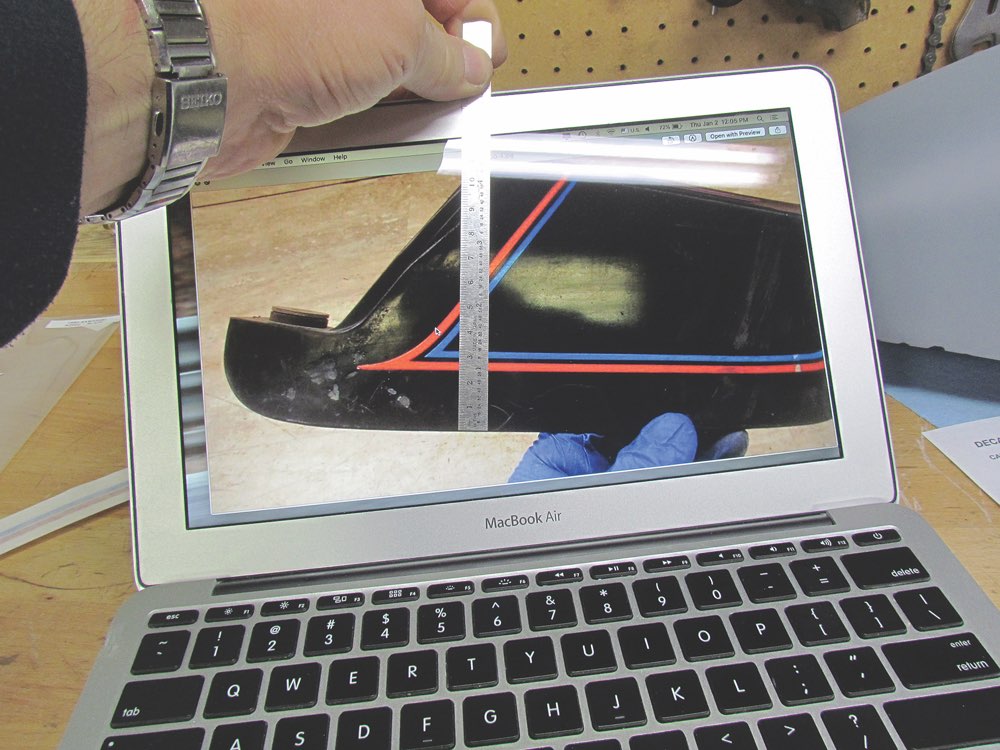
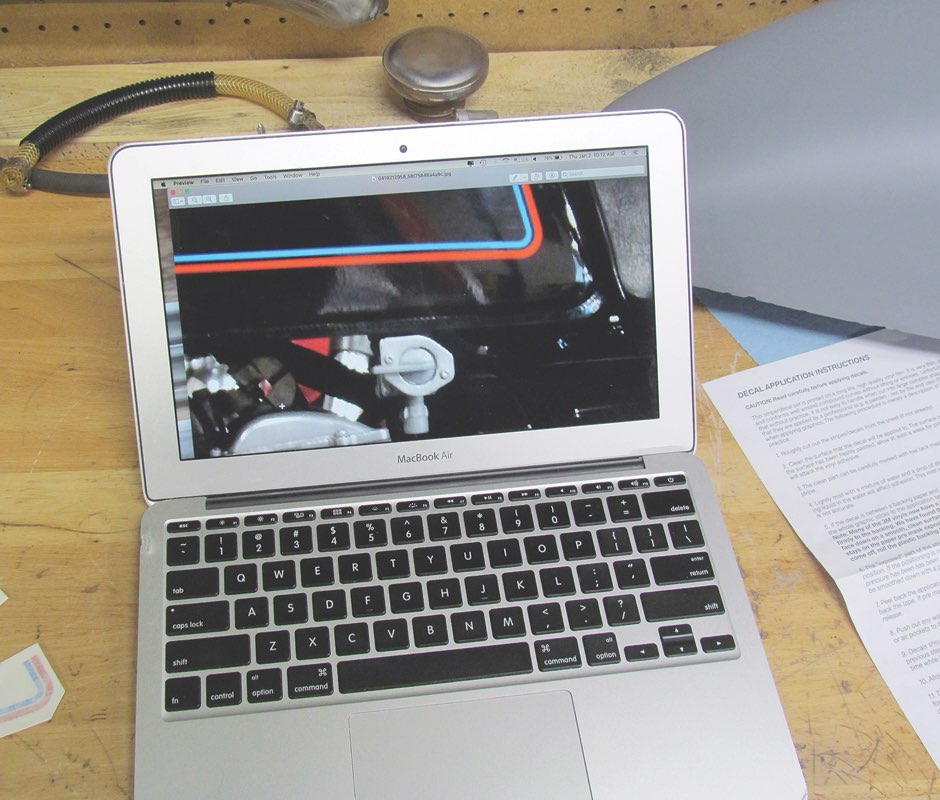
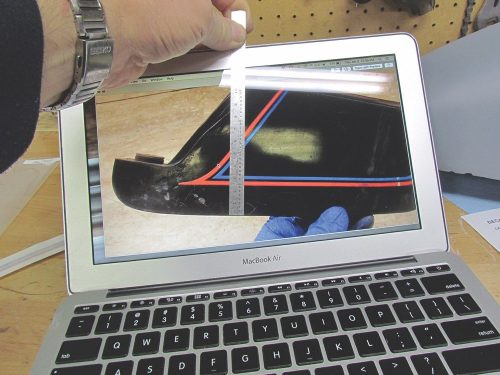
 Now, there are instructions for how to apply the decals, but there are no measurements given to apply them accurately. In order to place them correctly, I found pictures of the KZ550A and KZ550A body parts online, and I was lucky enough to find some that were taken from several angles, including directly from the side. Once these images downloaded into my computer, I scaled them to actual size so that I could take some reference points and make some measurements.
Using the fuel petcock as a reference, for example, I scaled up the image of the fuel tank until the onscreen dimensions of the petcock matched the dimensions of the actual petcock. Then I could use several reference points, such as the gas tank’s lettering and the edges of the tank, to take several measurements, which helped me to place the decals on the fuel tank. To confirm that my pinstripes were close to where they should be, there were very faint traces of shinier paint at the locations indicating where the originals were placed; the paint beneath the original pinstripes was not as worn as the paint that had been directly exposed to the elements since the bike was new.
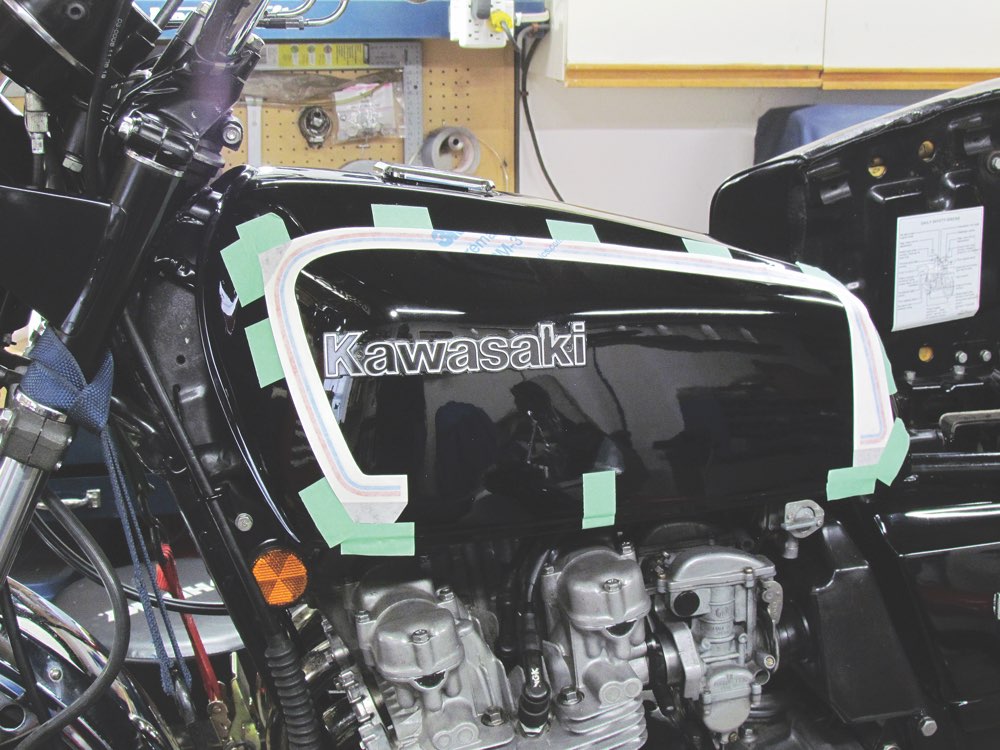
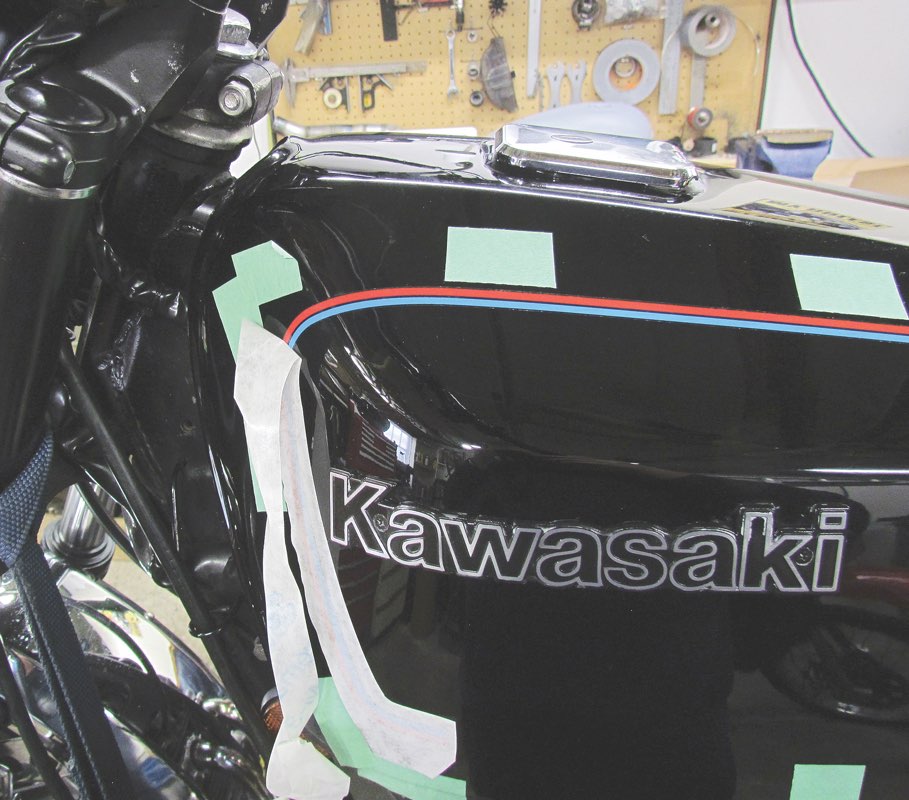
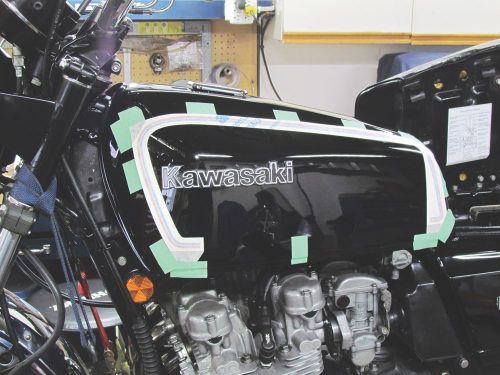
With measurements in hand and the gas tank’s surface thoroughly cleaned and dry, I placed the decals, which were still coated in their protective inner and outer film, onto the gas tank and held them in place with masking tape. Then I used more masking tape to mark the edge of the decal’s protective film at several locations, and removed them. The decals were cut into separate sections “out of the box,” so I had to align the decals perfectly before deciding on their final locations.
 With the backing film removed from the decals, I now had to install them permanently. According to the directions provided with the decals, a very light mist of water mixed with a touch of dishwashing liquid can be used on the surface on which the decals will be applied to help move the self-adhering decals once they are applied. Satisfied with the decals’ locations, I removed the top protective film very cautiously – careful not to lift the pinstripes from the paint.
The entire process took me several hours to complete. The only imperfection is a tailpiece decal that is very slightly off-centre, noticeable only if pointed out. If you’re not the patient type, find a professional painter who has experience with this type of work to perform the job. Do it right, though, and you’ll probably spend even more time admiring your handiwork. I did.
Technical articles are written purely as reference only and your motorcycle may require different procedures. You should be mechanically inclined to carry out your own maintenance and we recommend you contact your mechanic prior to performing any type of work on your bike.


Thanks for Reading
If you don’t already subscribe to Motorcycle Mojo we ask that you seriously think about it. We are Canada’s last mainstream motorcycle magazine that continuously provides a print and digital issue on a regular basis.
We offer exclusive content created by riders, for riders.
Our editorial staff consists of experienced industry veterans that produce trusted and respected coverage for readers from every walk of life.
Motorcycle Mojo Magazine is an award winning publication that provides premium content guaranteed to be of interest to every motorcycle enthusiast. Whether you prefer cruisers or adventure-touring, vintage or the latest models; riding round the world or just to work, Motorcycle Mojo covers every aspect of the motorcycle experience. Each issue of Motorcycle Mojo contains tests of new models, feature travel stories, compelling human interest articles, technical exposés, product reviews, as well as unique perspectives by regular columnists on safety or just everyday situations that may be stressful at the time but turn into fabulous campfire stories.
Thanks for considering a subscription. The Mojo team truly appreciates it.
