
Rabaconda Street Bike Tire Changer


At the risk of sounding cliché, this tire changer really is a game changer.
Those who like to tinker on motorcycles have likely attempted to change a tire or two over the years. I’ll admit I’ve had a few opportunities to change my own as well as friends’ tires, and generally speaking, it isn’t that much fun — especially when dealing with cold or old rubber, both of which make the tire carcass stiff and hard to work with. Equally difficult is a tire with a short sidewall. All of the above means you are going to struggle with tire irons, and there’s a good chance you’ll throw out a few expletives, scratch the rim in a few places and skin a couple of knuckles, no matter how careful you are.
I had seen the Rabaconda videos online and I thought the same as everyone else, judging by the comments: “This is really slick and looks way too easy.”
The Rabaconda Street Bike Tire Changer — not to be confused with the Rabaconda 3-Minute Tire Changer, which is designed for dirt bike tires and wheels with rim locks — comes complete with everything you need to easily change tires on cast, forged and spoked street and adventure bike wheels from 12 to 21-inches with axles 20 mm or larger (there is an optional spindle kit for 15 mm axles). And it doesn’t matter if you have a single- or double-sided swingarm: there are optional adapters to accommodate the rim’s larger centre hole of the single-sided variety.
Street Bike Tire Change Kits
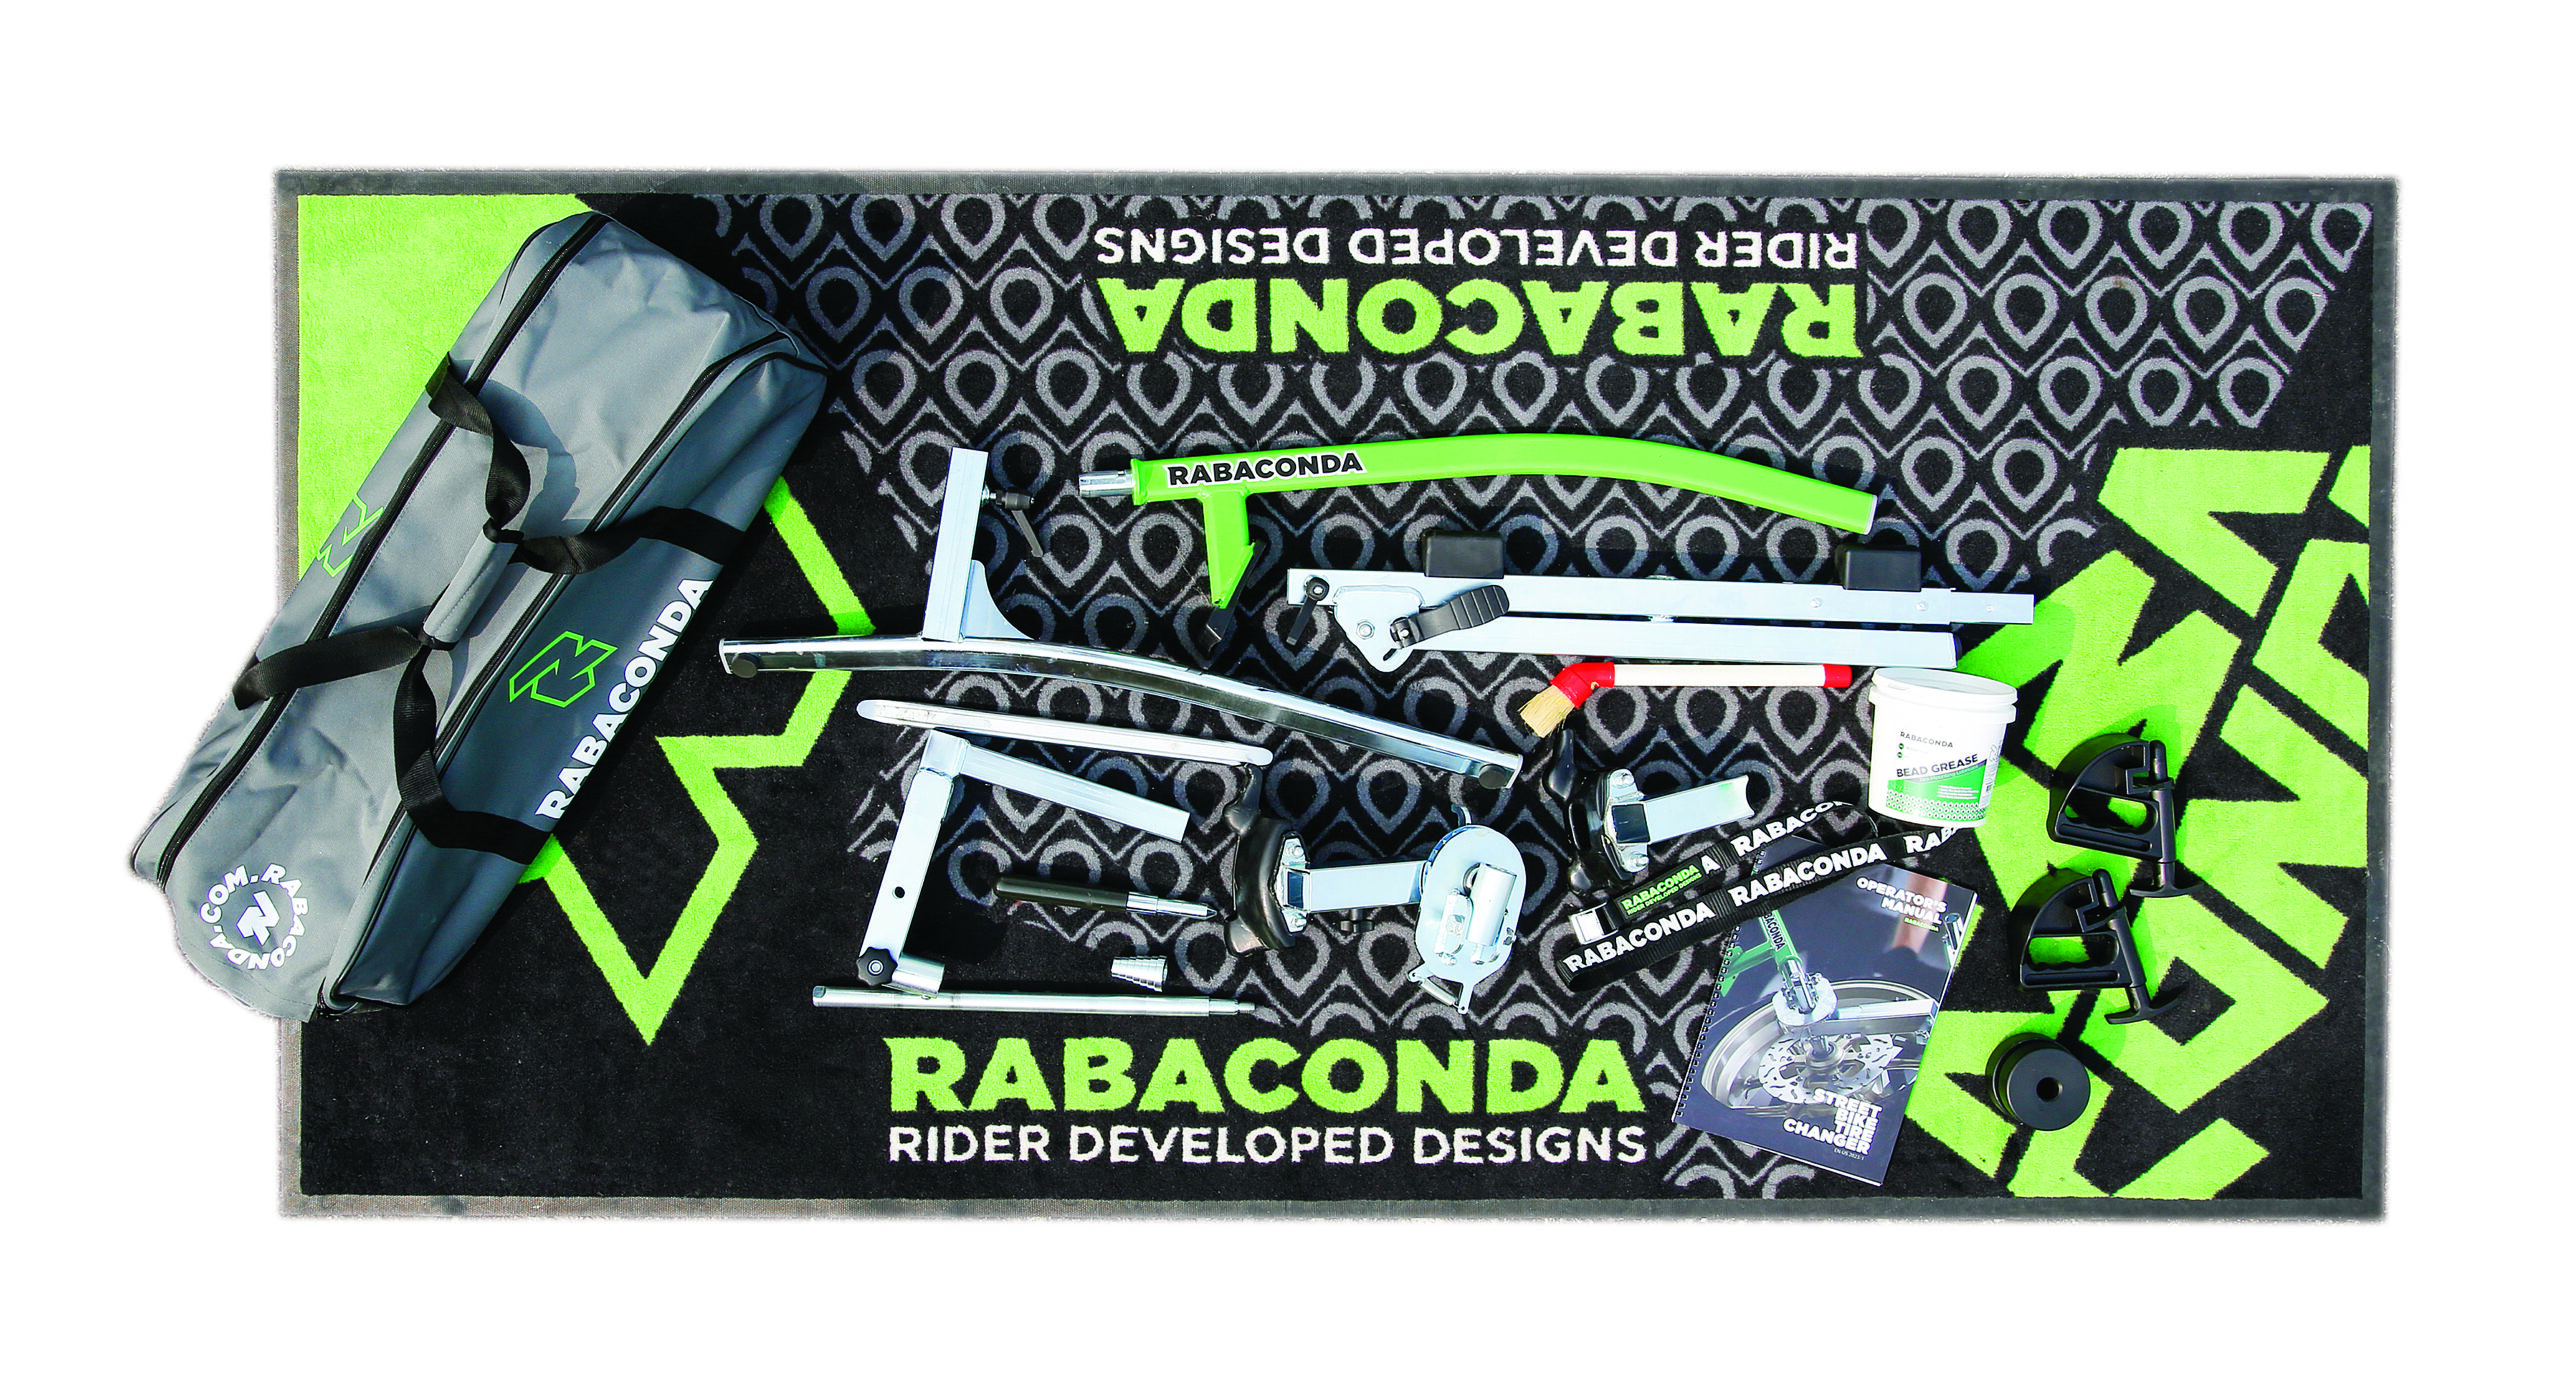
 There are three street bike kits available: the Basic, Starter and the Ultimate kit. The Basic kit is, as you guessed, is the tire changer and is certainly suitable for changing tires, but the Starter kit also comes with a pair of drop centre tools, bead grease and a bead grease brush — all of which you’ll need if you don’t already have them. The Ultimate kit includes every accessory needed to change tires on all of today’s modern bikes — you might find your friends lined up at your door.
The accessories — which can also be purchased one at a time — include a wider duck head designed specifically for cross-spoke wheels (wheels with spokes on the wide outer lip, featured on many adventure bikes such as the BMW GSs, Triumph Scrambler and Tiger, newer Honda Africa Twins, Ducati Multistrada, Moto Guzzi V85, etc.), 15 mm spindle kit, BMW shaft drive adapter, Universal big hub adapter and Ducati adapter.
The whole shebang also comes with a convenient carry bag for storage or transport to your buddy’s place or to the track. Assembly of the tire changer is super easy and, unlike any of the tents or sleeping bags you’ve ever bought, all of the Rabaconda pieces actually fit back in the bag. The tire changer weighs in at a paltry 13 kg, plus any accessories you take with you.
Assembling the Rabaconda Street Bike Tire Changer was the first time I was impressed with it. The feel of the parts and the quality finish really had me thinking this is a very durable piece of kit. The premium-quality components are made in the EU.
Rabaconda First Use
After a quick look through the very complete and informative 35-page manual, I assembled the machine in minutes and proceeded with my first tire install, which was not an ideal candidate by any means. I had considered cutting the rubber off the rims of a project bike not expecting to need tires until the bike was back together — luckily, I put up with the frustration of spooning the tires off. As it turned out, I needed to move the project bike and needed rubber to make it a roller.
The manufacture date embossed on the hard sidewall said the tire was built 20 years prior, so to say the carcass was stiff is an understatement. The inner bearing dimension was 20 mm, so I didn’t need the centring cone that came with the machine. I followed the instructions step by step and the 20-year-old tire went on the rim with no problem at all. I was very impressed with the Rabaconda, for the second time.
Now to More Modern Rubber
It was time for a live subject, and I opted for the rear tire on my R1250GS. I had ordered the BMW shaft drive adapter and the cross-spoke duck head along with the ‘starter’ Rabaconda Street Bike Tire Changer. Also, there is no need to remove sprockets or brake discs as the strong, adjustable magnetic blocks that support the rim allows enough space for the disc or sprocket between the rim and the tire changer.
I had changed the front and rear tires on the GS last spring using the old-fashioned skin-my-knuckles-and-scratch-my-rim-technique, so while I wouldn’t be changing the rubber per se, I did practice removing and reinstalling the rear tire, which is now a Continental TKC 70 Rocks. Adventure tires are generally stiffer and have short sidewalls in order to take the abuse of rocks and off-road shenanigans they might experience, and I wanted to compare the ease of removal and installation on the Rabaconda with TKCs against the original rear Michelin Anakee, so I also installed and removed the original tire (it still has tread so I kept it around in case of emergency.) I think the TKCs are a bit stiffer, but the machine took care of both tires admirably.
I did struggle a little with breaking the bead of the TKC on the Rabaconda, but it did eventually break the bead on both sides. I must say: using the Rabaconda was easier than originally breaking the bead on the Anakees, for which I had to use the frame of my truck, an eight-foot 2×4 and various pieces of lumber as a second-class lever — it was not an easy task. And even though I used rim protectors, they didn’t fit the bigger lip of the cross-spoked wheels and I scratched the wheels. Rabaconda wins again, big time.
Practice Makes Perfect
 After five or six practice sessions, I was able to remove and reinstall the tire in seven minutes, not counting breaking the initial troublesome beads — add a few minutes onto the time for that. From where I live, it takes me 30 minutes just to get to a shop to have new tires installed. Add in the time and cost for the installation — if I can even get in right away — and then the trip back home and time to install the everything back on my bike, and I’m looking at around two and half hours minumum. My time is valuable, and that cuts into riding time.
It’s important when changing tires to use appropriate lubrication on the rubber as the rubber has to slide on the rim. I used a spray bottle with dish soap mixed with water for tire removal as it’s too difficult to get tire grease between the rim and the tire, and I then used the Rabaconda tire grease supplied in the starter kit for installation.
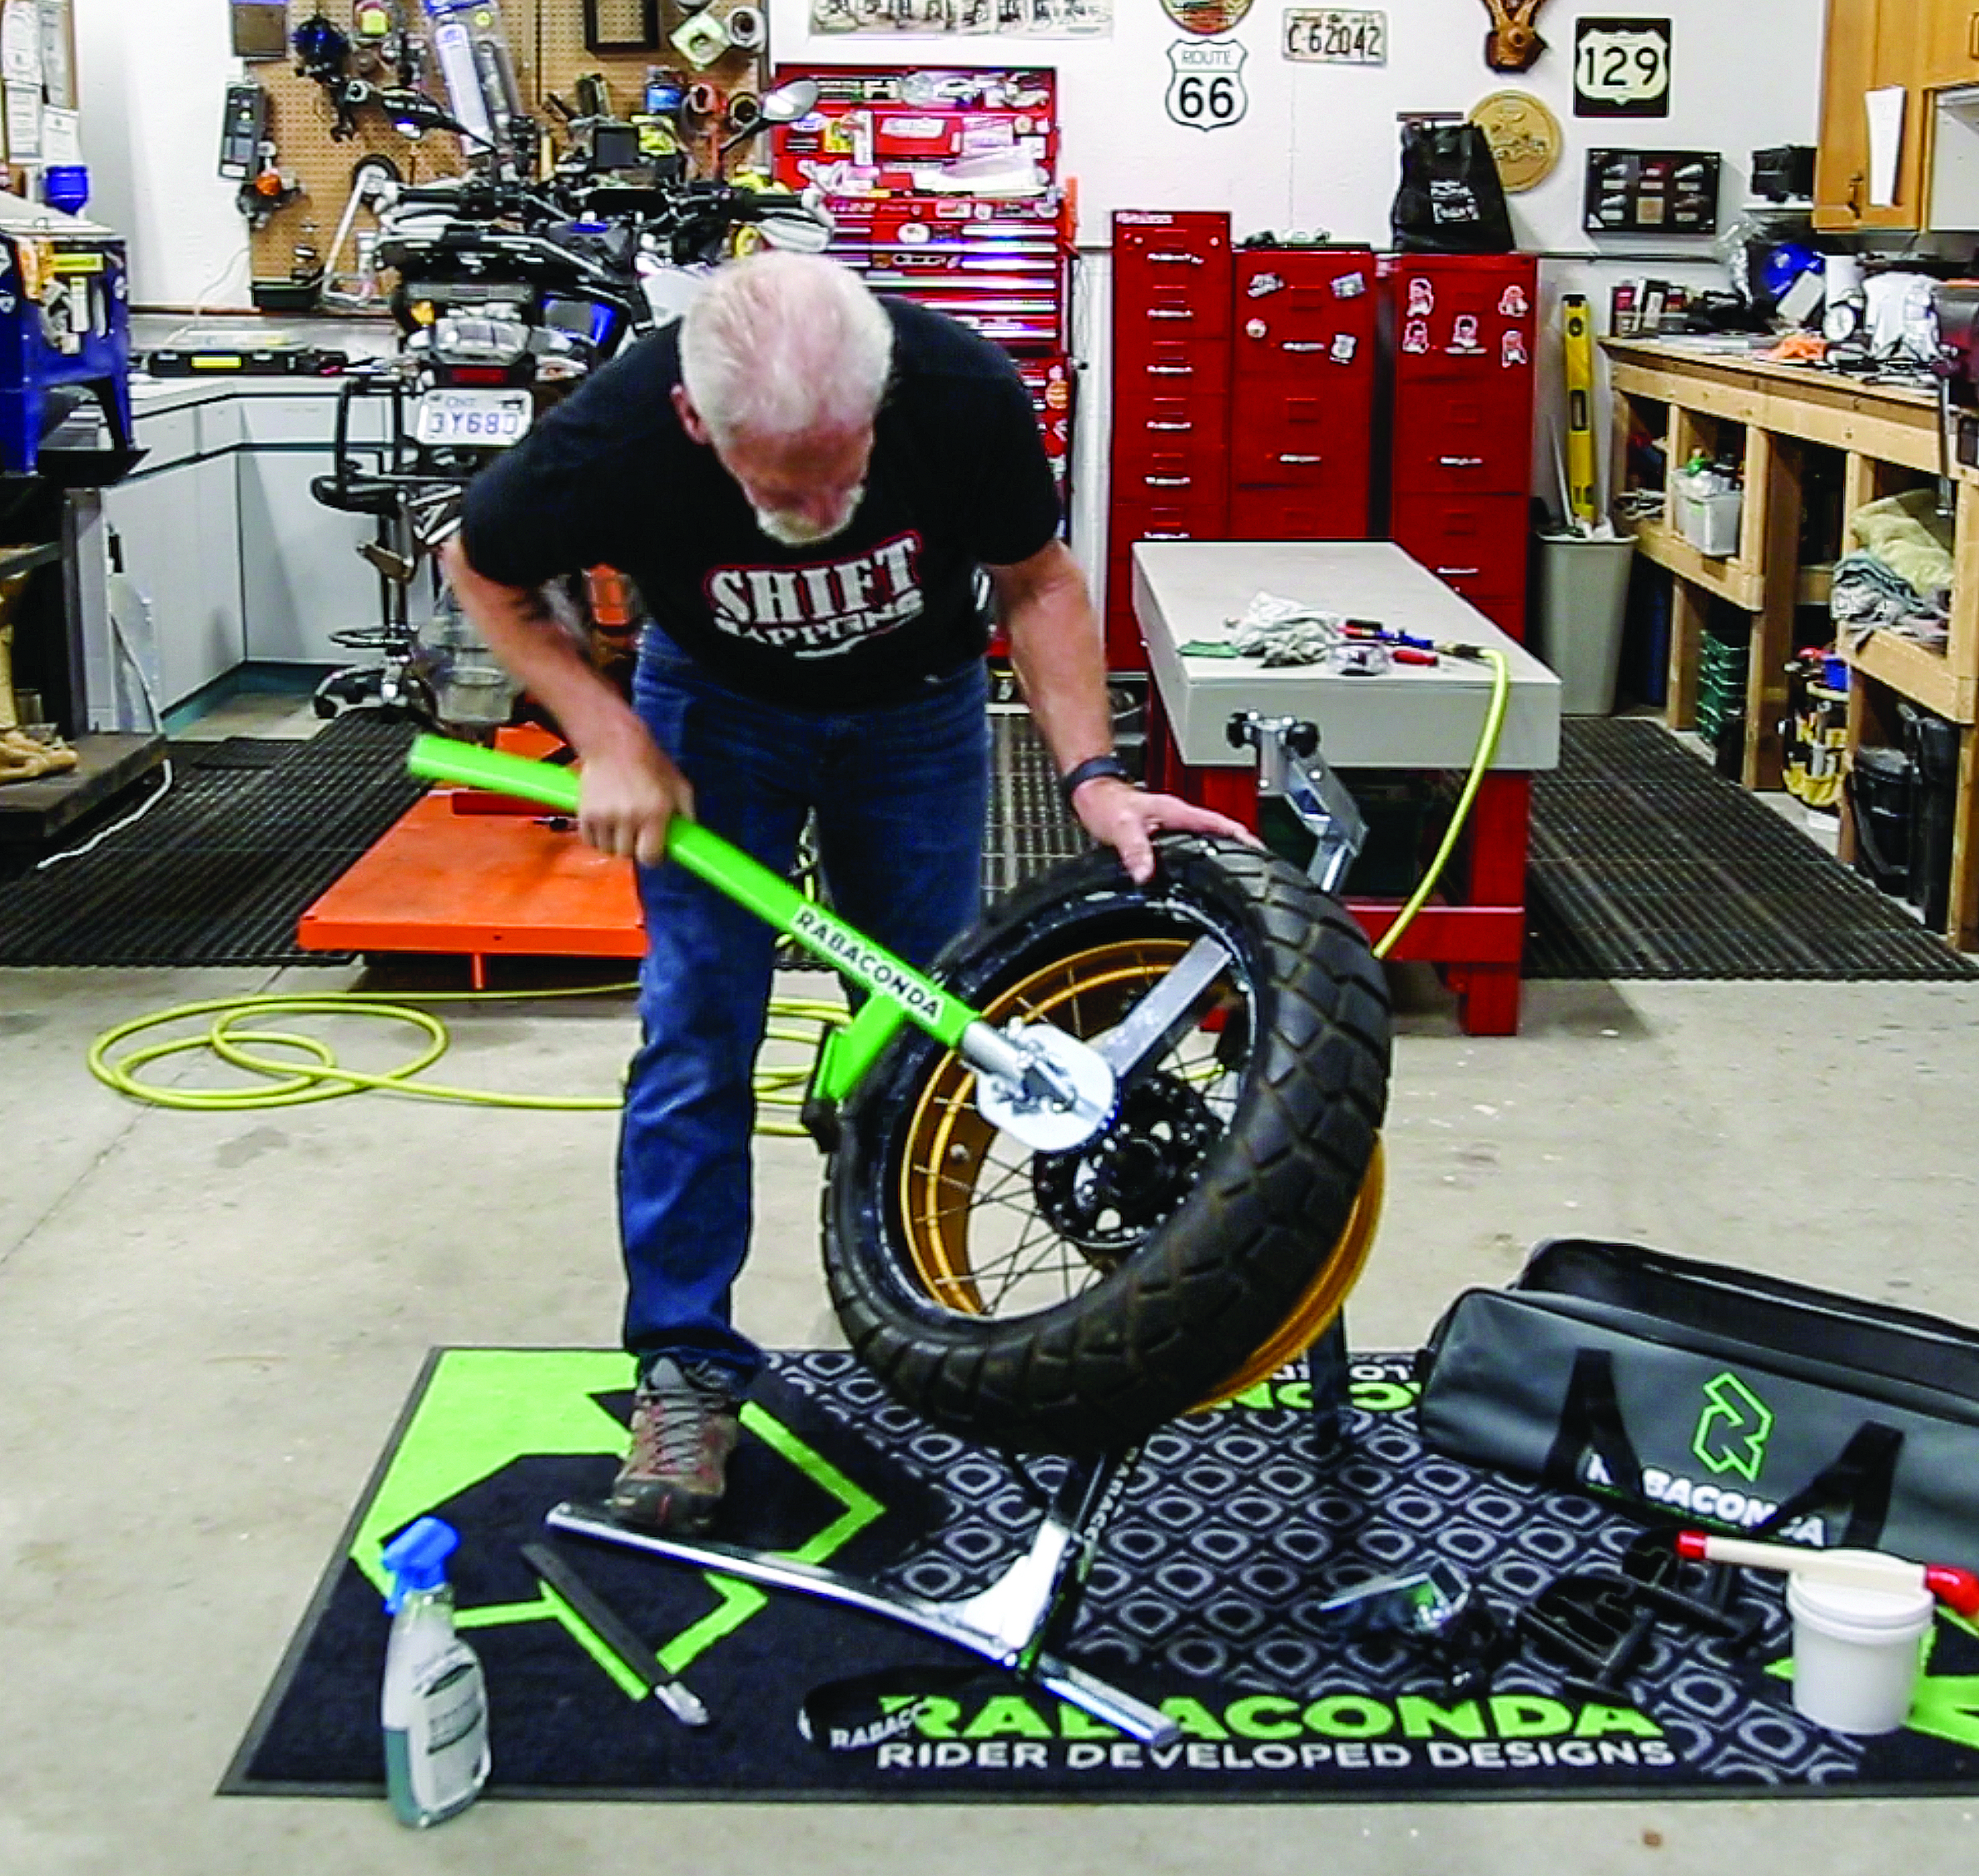
The key to the Rabaconda — in addition, of course, to its design and engineering — is the ratchet system. Once the duck head is in place, you simply push on the ratchet arm and the duck head rotates around the tire to either dismount or mount the tire. It really is quite ingenious, and so easy.
The instruction manual is very complete, with descriptive text and plenty of clear, colour photos. I did find, however, in my practice sessions that I deviated slightly from the manual. The 1250GS has Tire Pressure Monitoring Sensors, which I wanted to protect at all cost. The manual says to position the valve stem at 3 o’clock, but I found taking the second bead off would hang up on the sensor so I moved the TPMS to 9 o’clock, which completely eliminated the bead even coming close the sensor.
Mounting the Tire
Mounting the tire was just as easy. Never does any metal touch the rim while dismounting or mounting the tire and I didn’t end up with even a scratched knuckle.
As an aside, you must balance the tire at some point and I prefer to use Counteract balance beads (bikebeads.com) to balance my tires — I’ve use them for many years on all of my bikes from Harleys to dirtbikes, and they are by far my choice over any kind of weights. One nice thing about the Rabaconda is the angle at which the tire sits when mounting. Before ratcheting the second bead on, I simply poured in the balance beads instead of installing them through the valve stem. Once again, the Rabaconda wins in this case by eliminating the balancing procedure.
I know describing every action of the Rabaconda is too many steps to include here or to really show how easy it is to use, which is why I made a video for you to check out on our YouTube channel, or by scanning the QR code on this page.
In a nutshell, just let me say that it works, and works really well — if you change your own tires, you’ll wonder how you ever got by without it in the past
Overused Cliché? But it’s True
Upon my first attempt at mounting that 20-year-old tire, my first thought was: this is a game-changer. I know that phrase is cliché and overused, but this Rabaconda tire machine really is a game-changer — 100 per cent.
The Rabaconda comes with a life-time warranty against manufacturer’s defects and a money-back guarantee for six months if you aren’t happy with the product, no questions asked. Personally, I seriously doubt you could be unhappy with it.
Unfortunately, there aren’t any Canadian dealers at this time.
The basic kit costs $589, the starter kit is $623 and the ultimate kit will set you back $799 — all prices are in U.S. funds. The BMW Shaft Drive adapter is $39 and the cross-spoke duck head is $45.
The Rabaconda Street Tire Changer isn’t cheap, but when you consider the cost and time of taking your tires to a shop to have them changed, the price seems a bit more reasonable, especially if you change tires a couple times per year (maybe you have street tires and ADV tires, or knobbies, you’d like to change out when needed) or need tire changes at the track.
I have to say that I am thoroughly impressed with this game-, I mean, tire-changer and have offered to all of my riding buddies that if they need tires changed, I’ve got the machine for the job.
Check out Rabaconda at us.rabaconda.com and to learn more about the Street collection of tire changers go to us.rabaconda.


Thanks for Reading
If you don’t already subscribe to Motorcycle Mojo we ask that you seriously think about it. We are Canada’s last mainstream motorcycle magazine that continuously provides a print and digital issue on a regular basis.
We offer exclusive content created by riders, for riders.
Our editorial staff consists of experienced industry veterans that produce trusted and respected coverage for readers from every walk of life.
Motorcycle Mojo Magazine is an award winning publication that provides premium content guaranteed to be of interest to every motorcycle enthusiast. Whether you prefer cruisers or adventure-touring, vintage or the latest models; riding round the world or just to work, Motorcycle Mojo covers every aspect of the motorcycle experience. Each issue of Motorcycle Mojo contains tests of new models, feature travel stories, compelling human interest articles, technical exposés, product reviews, as well as unique perspectives by regular columnists on safety or just everyday situations that may be stressful at the time but turn into fabulous campfire stories.
Thanks for considering a subscription. The Mojo team truly appreciates it.
