
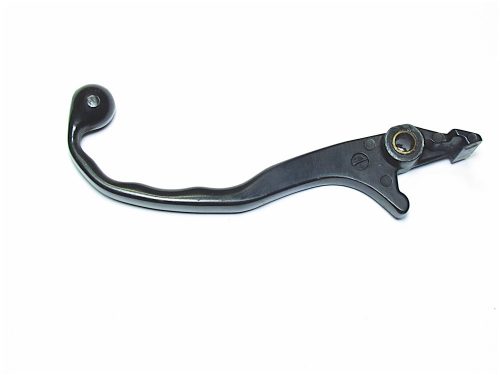
Straightening An Alloy Lever


It’s all too easy to bend a brake or clutch lever, and even though an aftermarket replacement can cost as little as 10 bucks, there are any number of reasons you might want to repair it. In my case, I wanted to keep the discontinued OEM lever on a 1982 Honda FT500 Ascot I recently acquired because I intend to restore the machine to its original condition. Problem was, the brake lever was bent over like a banana.
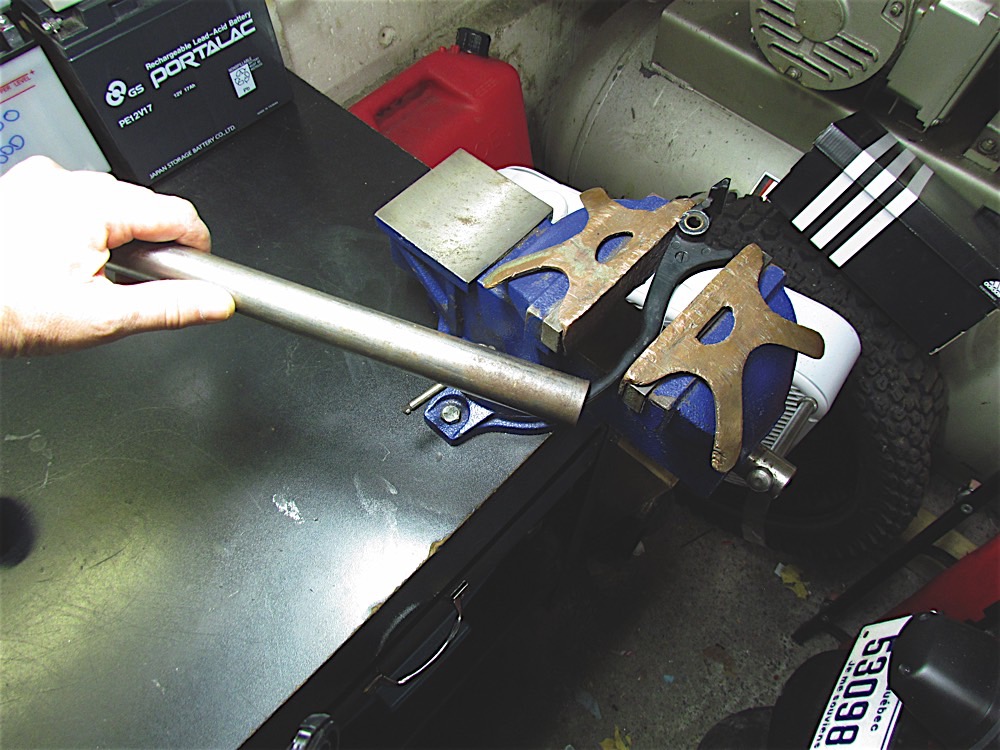
 The aluminum alloy used to make OEM levers is relatively soft (which is why they can bend quite a bit before breaking), and if proper care is taken, they can be straightened. Once you remove the lever, you’ll need a propane torch, a steel tube of about one inch in diameter, a rubber mallet, a small piece of two-by-four and a bar of soap. Oh, and it’s also handy to have a bench vice with soft jaws. And some patience.
Aside from a severe bend, my FT500 lever also had a considerable scrape on the end ball that also needed repair. The end ball is an important safety feature made to prevent injury, so if it’s broken off, throw that lever out.
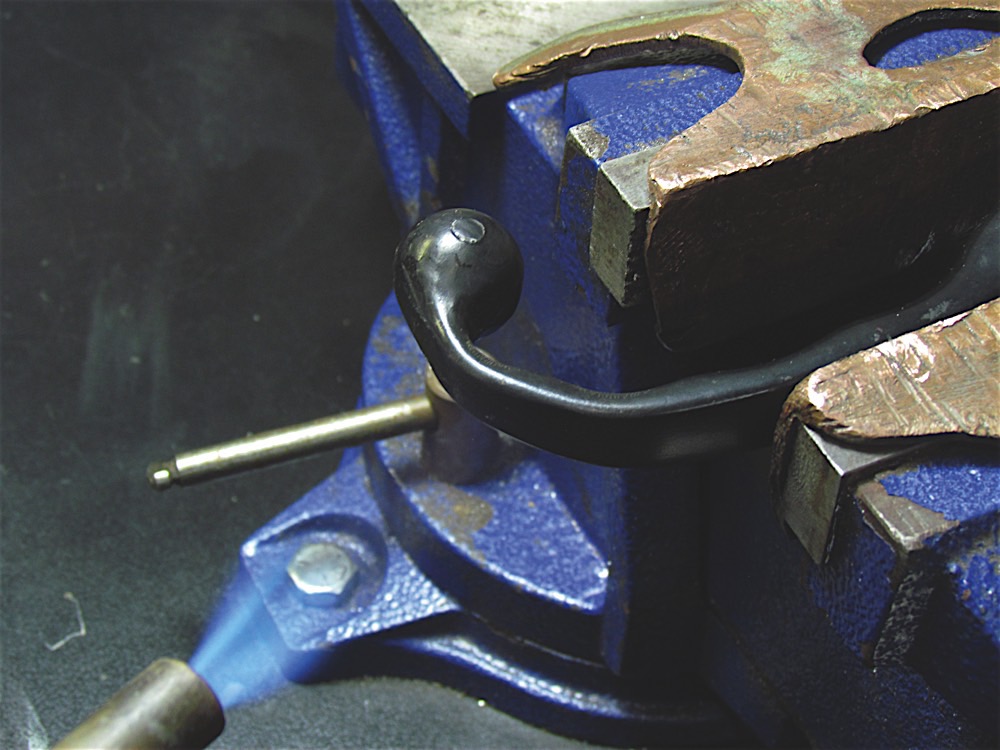
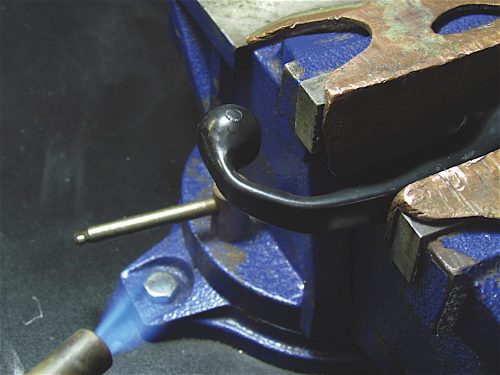
First, you must assess if it is repairable. Inspect it carefully; if there are any cracks in the lever, it cannot be straightened. If no cracks are visible, grip it in a vice with soft jaws (I use copper inserts), and begin applying some heat with the propane torch. Do not use acetylene – it’s too hot and will melt the lever. You can apply heat locally to the area you want to straighten first.
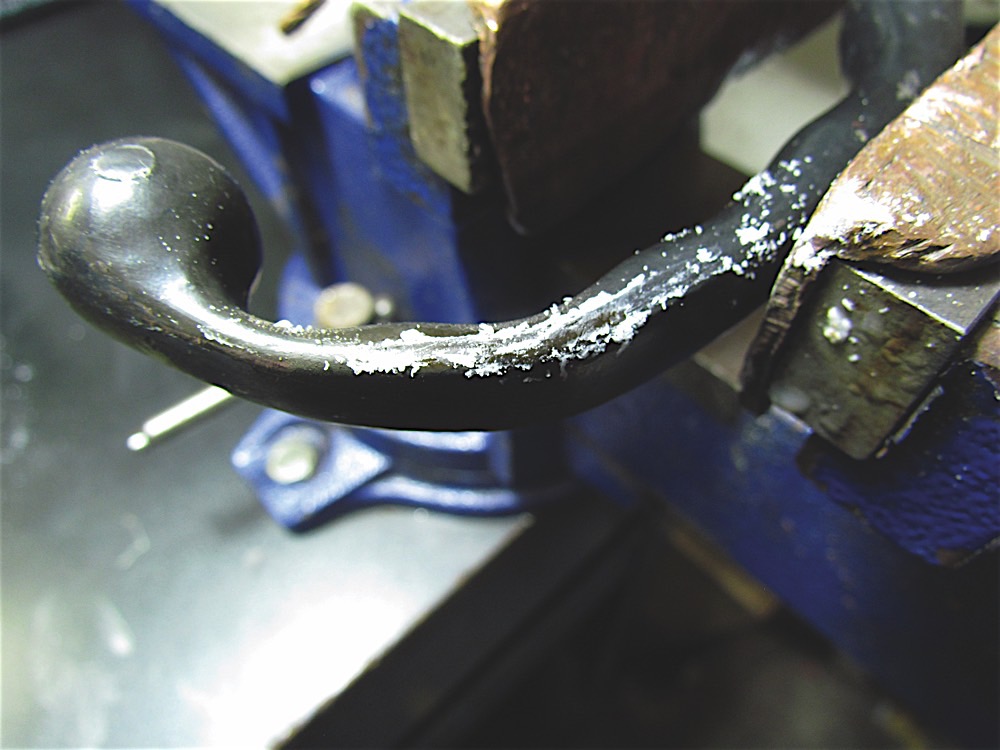
Begin by straightening the thickest part of the lever, maintaining strength in the thinner part near the ball end for leverage. Now, remember the bar of soap? It’s used to monitor the lever’s temperature. Too cold, and the lever can snap; too hot and it can form cracks. As you heat the lever, rub some soap on the area being heated. Once it melts and begins to look like black, shiny resin, you can begin straightening the lever. To do this, slip the steel tube over the lever and pull on it gently: you will feel the lever giving. So as not to mar the lever, thus causing further damage that will need repair, chamfer the inner edge of the steel tube with a file.
 Here’s where your patience comes into play. You must straighten the lever in tiny increments, visually checking your progress and reapplying heat as you go. Don’t forget to keep using the soap to monitor the temperature. Once you’ve got the larger bend out of the lever, it’s time to tweak the smaller, sharper bend near the tip. To do this, you must allow the lever to cool down on its own. Do not dip it in water or oil to cool it, as this will make it brittle and prone to breakage.
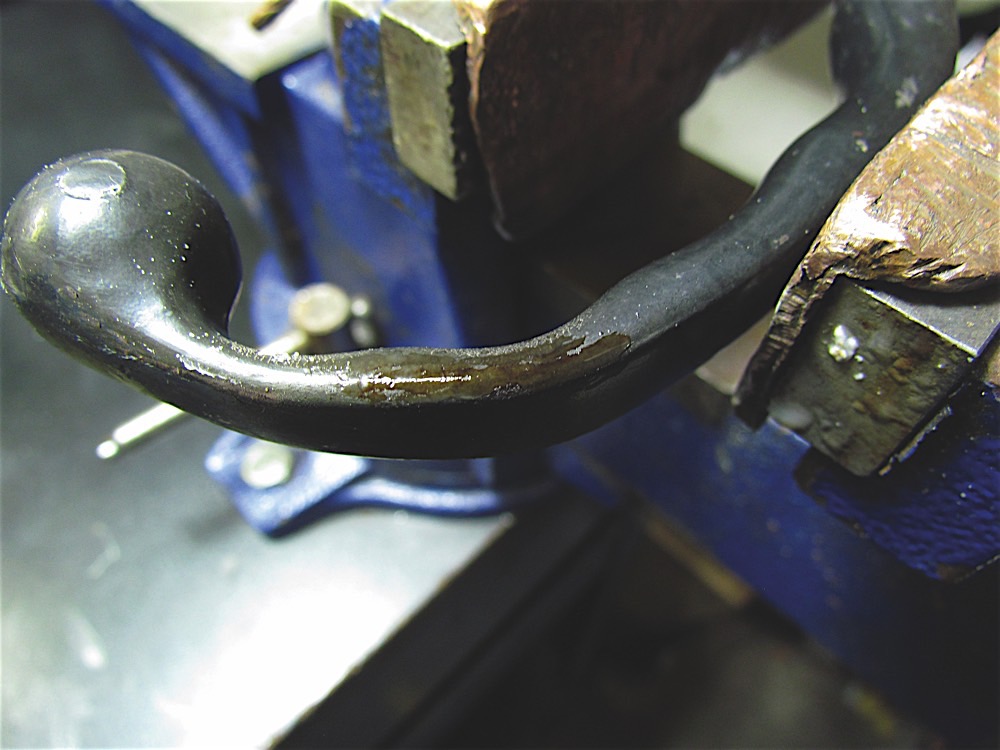
Once the lever has cooled enough to handle, reapply some heat by concentrating on the sharper bend. Again, straighten it gently and in tiny increments. As a gauge, you can trace the bend of an undamaged lever, perhaps the other lever on your bike, on a piece of paper and compare with the lever being repaired. When the lever is close to its original form, you can straighten a broader area by heating the entire lever, placing it across the two-by-four and using the rubber mallet lightly to make the final adjustments. It took about 20 minutes to get my lever straight.
Once the lever is straightened to your satisfaction, inspect the inner edge of the bend carefully with a magnifying glass for any cracks that may have developed while straightening. If you see a crack, chuck it in the trash bin and pop a beer as a reward for a valiant effort.
 After it has cooled, it’s time to file or sand out any scratches or scrapes. The trick when filing the ball is to file a large area, so as not to form an unsightly flat spot. This means you’ll actually be making the ball a tiny bit smaller overall, but it will maintain its spherical shape.
The last item on the list is the finish. Black OEM levers are usually anodized so that the finish won’t wear off with use, and reproducing the exact finish isn’t possible unless you get the lever anodized again. In my case, I settled for a coat of semi-gloss paint. If it’s an aluminum-coloured lever, you can polish it or give it a brushed finish with a Scotch Brite scouring pad, but you should also give it a coat of clear enamel to protect its finish. If you have succeeded, reinstall the lever on the bike and admire your hard work – and don’t forget: you also deserve a beer.
Technical articles are written purely as reference only and your motorcycle may require different procedures. You should be mechanically inclined to carry out your own maintenance and we recommend you contact your mechanic prior to performing any type of work on your bike.


Thanks for Reading
If you don’t already subscribe to Motorcycle Mojo we ask that you seriously think about it. We are Canada’s last mainstream motorcycle magazine that continuously provides a print and digital issue on a regular basis.
We offer exclusive content created by riders, for riders.
Our editorial staff consists of experienced industry veterans that produce trusted and respected coverage for readers from every walk of life.
Motorcycle Mojo Magazine is an award winning publication that provides premium content guaranteed to be of interest to every motorcycle enthusiast. Whether you prefer cruisers or adventure-touring, vintage or the latest models; riding round the world or just to work, Motorcycle Mojo covers every aspect of the motorcycle experience. Each issue of Motorcycle Mojo contains tests of new models, feature travel stories, compelling human interest articles, technical exposés, product reviews, as well as unique perspectives by regular columnists on safety or just everyday situations that may be stressful at the time but turn into fabulous campfire stories.
Thanks for considering a subscription. The Mojo team truly appreciates it.
